Resilient is a bit click-baity, what I really mean is “More resilient than it came out the box”. Firstly lets look at the usual default setup.
“Out the box” config.
When most people unbox a Pi 4 and plug it in, they’re usually using a microSD card of some variety, Wi-Fi or Ethernet if they’re lucky and topped with “whatever usb-c power brick you found in your drawer”. The obvious issues with this setup are microSD cards, even high endurance ones, don’t have high endurance or high performance, many people wake up one day to find their Pi 4 doesn’t boot and erm… they didn’t have a backup. Wi-Fi isn’t a go go for Servers, it has variable conditions, higher latency and takes more power and supplying reliable power to your Raspberry Pi 4 can greatly affect its performance and reliability.
mikenet config.
I’m a realist, this is a “double digit dollar” SBC. It simply will never be as reliable or resilient as “Server grade hardware”, but we can try and get closer!
For this setup I wanted something that satisfied the following constraints/requirements:
- Faster, more reliable and resilient storage.
- As little cable clutter as possible.
- Stackable or “native” feeling to the Pi 4.
Here’s what i’ve gone for:
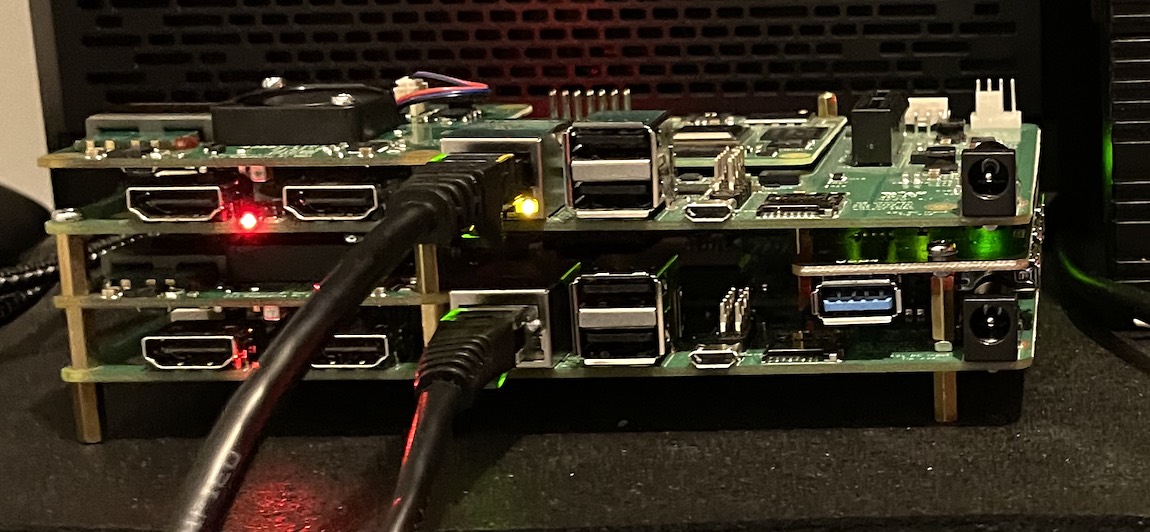
Storage
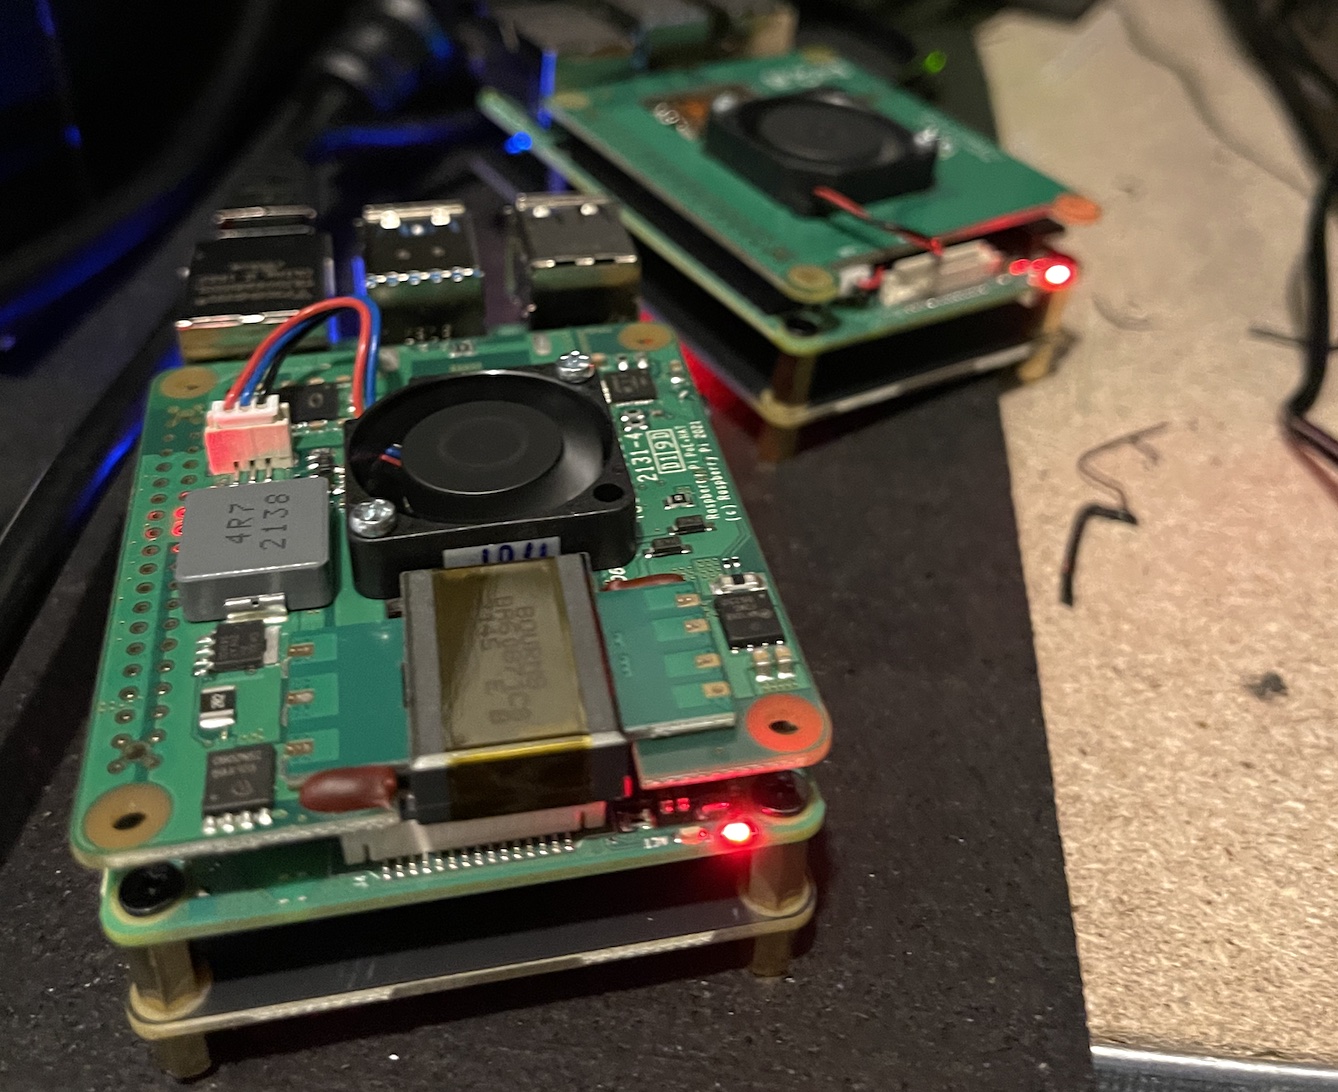
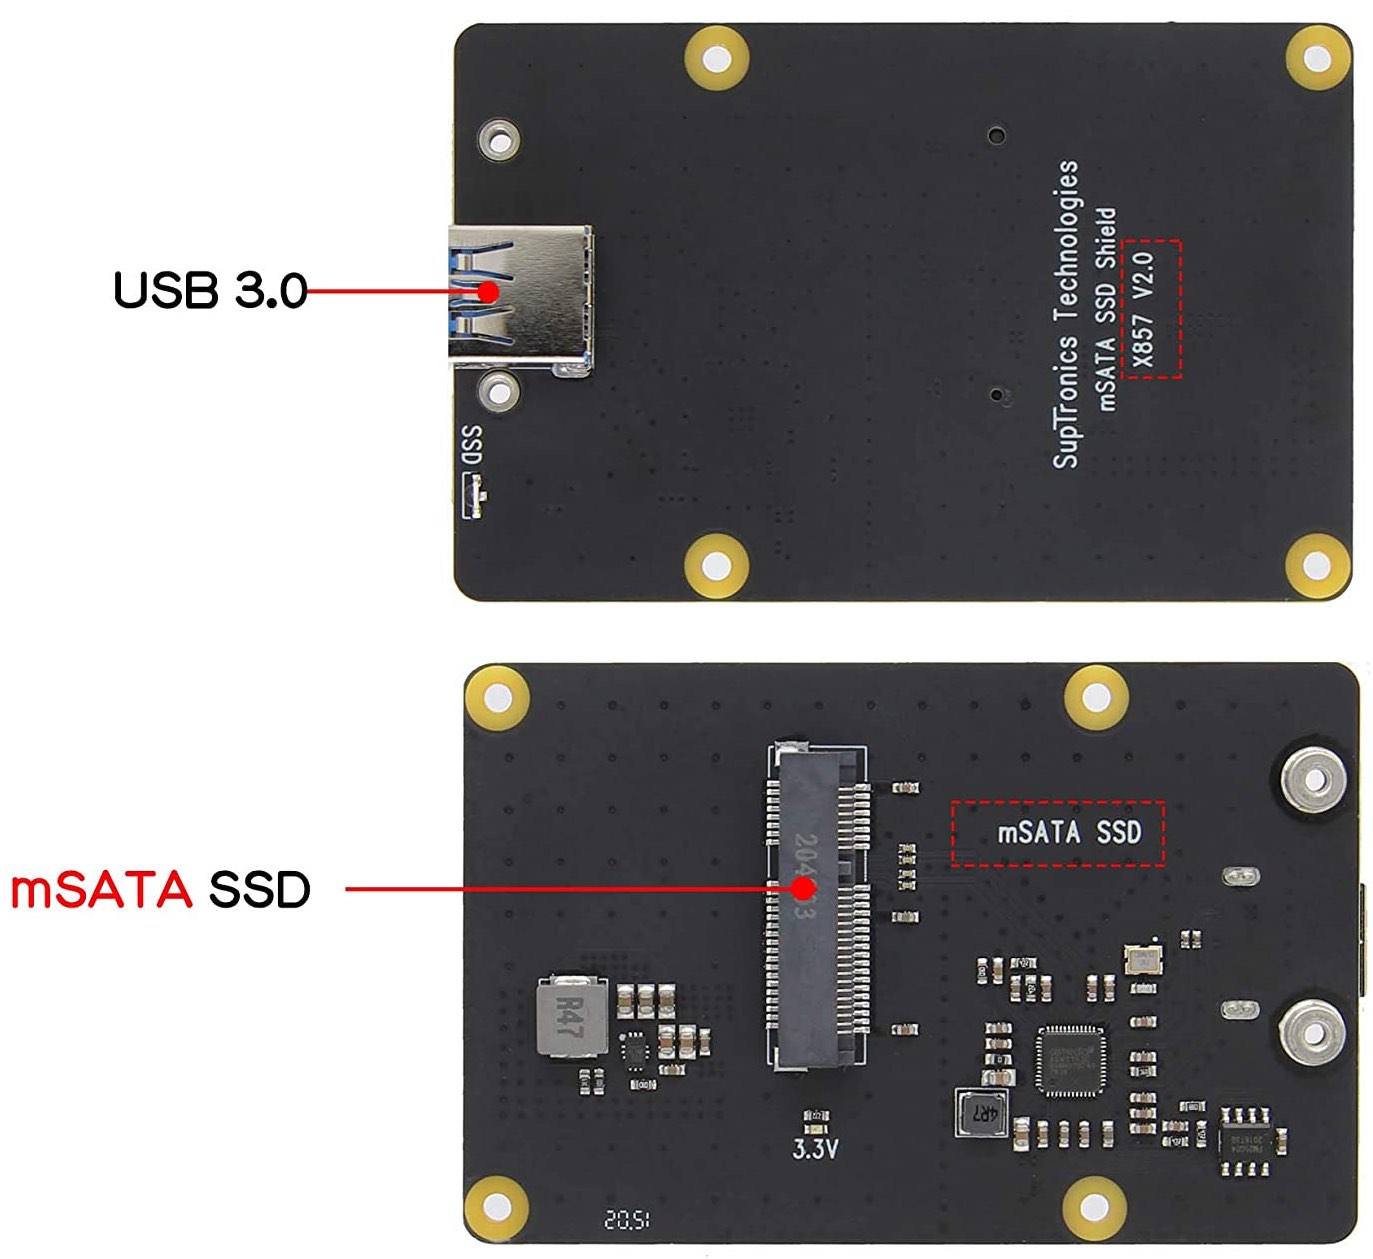
As of quite recently Raspberry Pi 4 now supports booting by NVMe / PCI-e / USB / Netboot. The latter was an interesting option but it introduces another external dependency and can be slow and I didn’t want to bottleneck the 1 Gbit port. So i’ve gone for an mSATA SSD, connected via USB, but mounted directly beneath the Raspberry Pi 4. It’s giving me great performance so far and feels “native”. The weapon of choice was the Geekworm Raspberry Pi 4 mSATA SSD Adapter. Along with an Integral 512GB mSATA Internal SSD. Being powered by the Pi 4 and using the native USB 4 interface, whilst having 0 cables, this fits my constraints quite nicely.
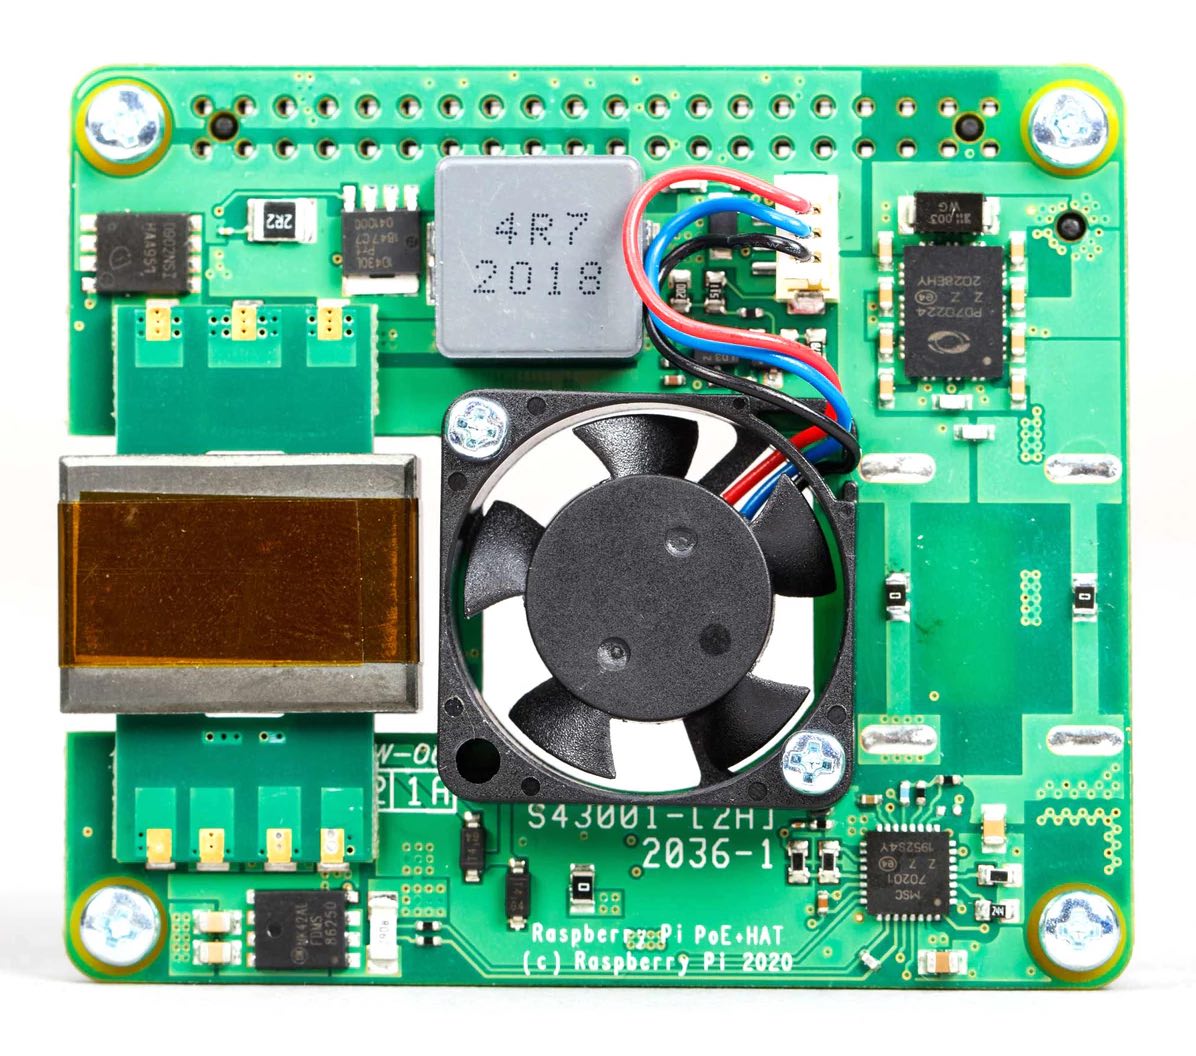
For power i’ve taken an obvious choice. The official Rapsberry Pi PoE+ HAT. This again satisfies many constraints and being PoE+ delivers 18W of reliable power to each Raspberry Pi 4.
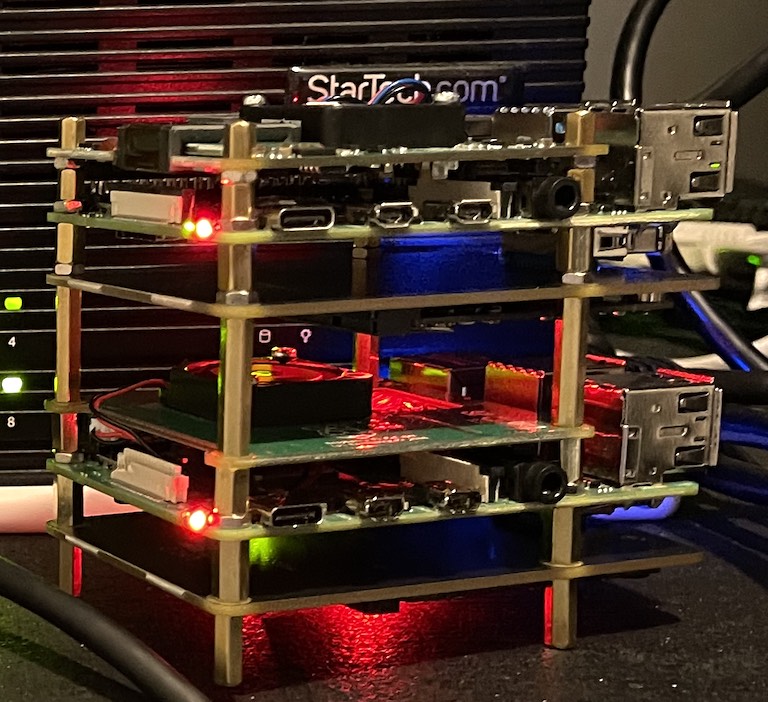
None of these items require any special configuration or kernel modules if you’re using the latest Raspberry Pi OS and also support vertical mounting via brass standoff’s. I now have 4 Pi’s in this configuration in my cluster and so far they’re stacking well.
It is worth pointing out though that when using the PoE+ hat with the Compute Module 4 and the official Raspberry Pi CM4 Carrier Board (as I tried) you’re only getting 5V power and the PCI-E slot needs 12V power, meaning any accessory you put into those slots simply isn’t getting sufficient power.
Conclusion
Whilst clearly not perfect, this is going to enable a quite interesting hardware and software configuration (to be detailed in a later post), is very portable, and just requires a single Ethernet cable per Raspberry Pi 4 to carry both the Power and the Network.